Shipping Across the Darien Gap
When we started planning on driving the Pan-Am Highway, shipping across the Darien Gap was the most daunting obstacle. Now that we have made it through the gauntlet, I wanted to share our experience and understanding of the entire process.
First off, let me just say that this process can be very easy if you are willing to spend about $300 on shipping agents on both sides (Panama and Cartagena). With a shipping agent, they will take you around from place to place, and all you have to do is wait it out and sign documents. It is very easy. We opted for a shipping agent on the Panama side but decided to skip it on the Colombia side. Looking back, it probably would have saved us quite a bit of time if we had a shipping agent on the Colombian side.
Ready to read about the entire process?
When you arrive in Panama (or even before when you are on the road), you can start investigating your options. In Costa Rica, I started sending e-mails to shipping agents and shipping lines.
First off, we got a quote for RORO (roll on/roll off). In this setup, you drive your vehicle to the port and hand your keys over to a shipping company. They load and unload it for you. The quote was $1800. RORO price is calculated by volume you take up. That seemed really expensive, so I started looking into other options.
Side Note: I was not worried about security for RORO. First off, when our camper is down, no one can get to anything inside it. In addition, while I’ve heard stories about “that guy who had all his stuff stolen out of his rig while doing RORO”, I have never met anyone who first hand had any serious issues or knew anyone second-hand who did. The only story I have first hand is a guy I met on the Colombia side, who had left a broken iPod right on his dashboard (he left it there as a sacrifice and a test). When he got his car in Colombia, it was gone.
Some folks do LOLO (lift on/lift off). Basically, you drive onto a giant palette, and then they lift your vehicle on/off the boat as if it was in a container. Pros: you get to keep your keys, there are looser height/width restrictions as compared to shipping containers. Cons: your vehicle is just sitting up there on the deck of the ship without any protection. Probably not a big deal for the distance we were traveling, but maybe worth considering if you are going across a big ocean. I heard a second-hand account of someone’s rig getting messed up in a LOLO operation. I can’t verify it, but I’ll admit I was a little worried. I never got a quote for LOLO.
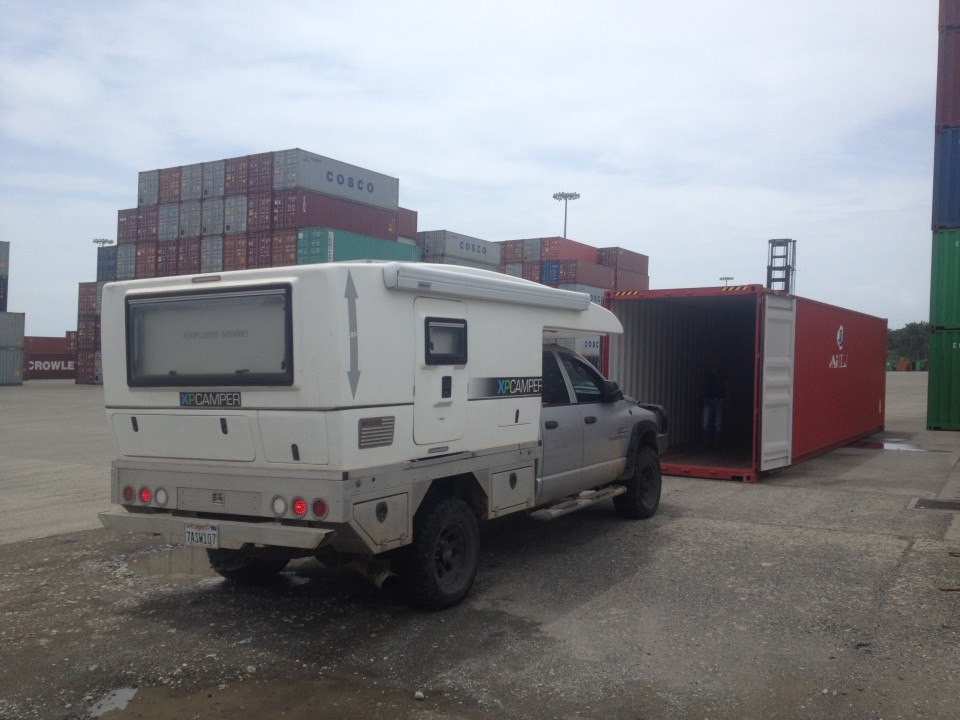
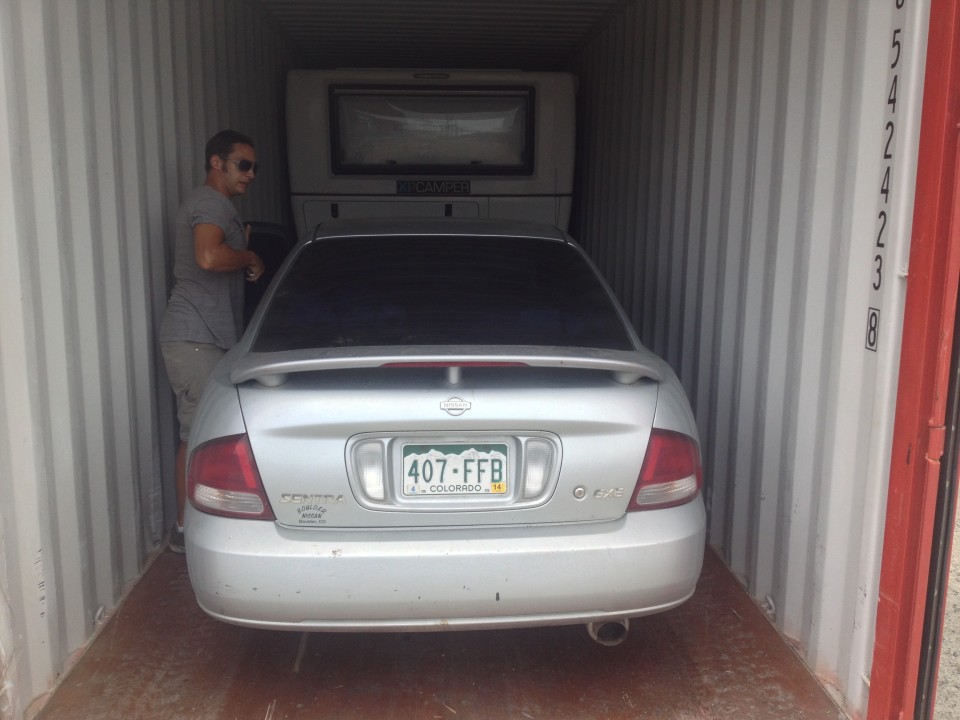
Finally, I looked into sticking the XP into a shipping container. I had heard that an entire 40 foot shipping container was only around $2,000. So if you can find a partner to stick another car in there, you can get a much lower price than RORO. Finding a partner was easy for us, but I realize this isn’t really an option for everyone.
I had 2 quotes for shipping containers. One came from the shipping agent Tea Kalmbach (teakalmbach@hotmail.com). She does the shipping a bit different. You hand your keys over to someone who will load your rig into a container for you. They keep your keys until you pick it up at the next port. The main advantage of this is that you don’t have to coordinate with a shipping partner. Unfortunately, you don’t get to supervise the loading process, which was important to me. I wanted to supervise and be able to take the awning off the rig if necessary. Tea’s quote came in at around $1400 total for a container (for one person). FYI, Tea is also familiar with SCLine who can arrange a RORO quote for you, so Tea is a good one-stop shop for information about container, LOLO, and RORO.
Then I found Boris Jaramillo (sales3@everlogistics.net). Boris lets you load your rig into your container. He has a staff who will help you strap it down, but you keep the keys at all times. With Boris, you have to coordinate for the drop-off and pick-up of vehicles in the shipping container with whoever else you are shipping with. That wasn’t an issue for us when we booked, although this complicated the process quite a bit in Colombia. Boris’ price was also lower than Tea’s.
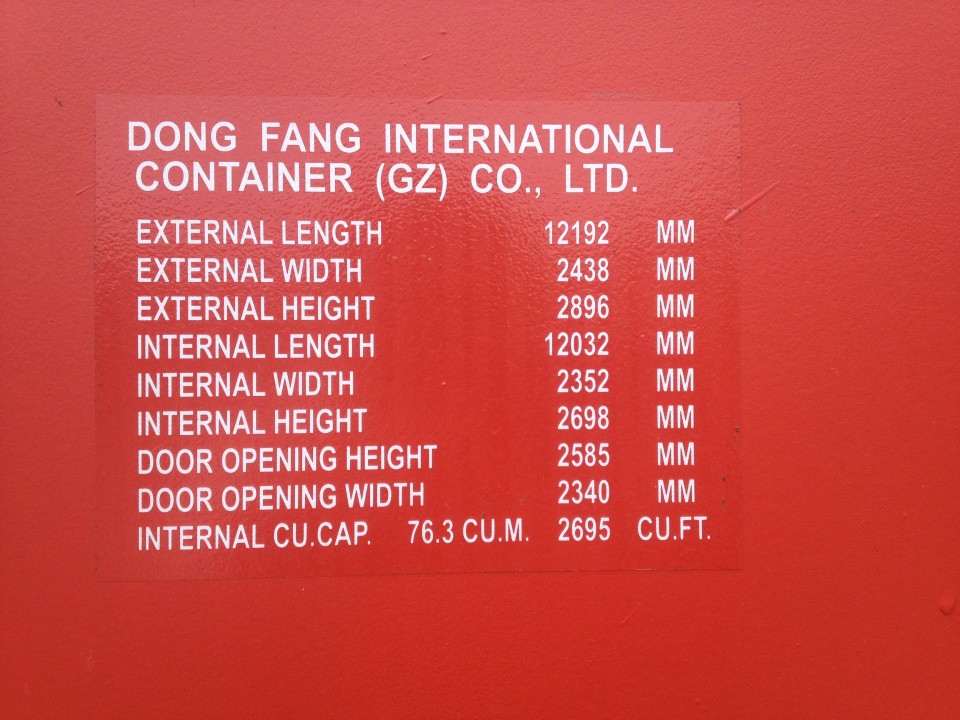
Shipping containers come in many sizes. The main difference in price is between the 20 foot containers and the 40 foot containers. We got a high cube container, which is slightly taller than the normal container, but there was no price difference. Here are the exact dimensions of the container:
We decided to go with Boris. All in, we will ship our truck across the darien gap from Panama to Colombia for $1025 — the lowest price we could find.
Side Note: It’s a great help if you can have a cell phone during this whole process in both Panama and Colombia. SIM cards and data plans are super cheap, so it’s worth looking into! We found Claro had the best coverage in Colombia, but had Movistar in Panama without any issues.
Panama
The People
The shipping agents in Panama make the process really easy. Yeah, you’ll pay a premium ($100 to $200), but in my opinion it was worth every penny. We talked to two agents:
- Tea Kalmbach: teakalmbach@hotmail.com
- Boris Jaramillo: sales3@everlogistics.net
We met a ton of people shipping with Tea, but only a couple of others who were shipping with Boris. I think it was nice for those shipping with Tea as there were about a half dozen Overlanders all going through the same process together. On the other hand, I can say that Boris (and his son) were great to work with, and I wouldn’t have changed a thing on that side.
The Places
- The Yacht Club – N 8.939845, W 79.554468 – Lots of parking around here, as well as places to stay (Country Inn & Suites). We ran into tons of overlanders here. Not a bad meeting place.
- DIJ Vehicle Inspection Area – N 8.96642, W 79.54476 – This is where you’ll have your vehicle inspected, to make sure the vehicle isn’t wanted by international police forces.
- Inspector General – N 8.96566, W 79.54542 – You’ll pick up paperwork here after having your vehicle inspected.
- Colon Port – N 9.339542, W 79.880354 – This probably isn’t a useful GPS point; it’s just in the middle of Colon. Our agent told us where to meet him.
The Process
First, talk to your shipping agent. They should be able to give you an overview of the process. It’s likely that things have changed since this report (June, 2014). When we were doing this process, there were tons of Overlanders camping near the Yacht Club or staying at the hotels (Country Inn & Suites) nearby. Side Note: you should make sure that your panama vehicle import permit is PERFECT. It can have NO discrepancies between your other docs. If it does, talk to your shipping agent.. You are in for some fun times correcting it in Panama City.
Everyone usually starts off Monday morning at the Vehicle Inspection Area. In theory, your engine needs to be cool, so give yourself some time to get there (the driving in panama is a bit crazy) and to allow it to cool down. I arrived at 8:30 (as instructed by my shipping agent), but when we were there, vehicles were only inspected at 10:00am. Tea’s group of Overlanders arrived around 9:30am, so they didn’t have to wait as long as we did. You need to have copies of documents (again, ask your agent); for us they were:
- Copy of passport
- Copy of drivers license
- Copy of vehicle title
- Copy of panama vehicle insurance (bought at the border)
- Copy of panama vehicle import permit (from the border)
The inspector will check out the documents, maybe verify the VIN number from the title, and then tell you to pick your stuff up at the Inspector General’s office that afternoon.
At 2:00 (or whenever the police inspector told you), go to the Inspector General’s office (you may want to take a taxi, not much parking here if you are in a big rig). Side Note: you will need to wear closed-toed shoes and pants in order to get into the office. You will need to get a security badge for entrance.
Enter into the nice A/Ced room and talk to the officer. You will need to give him another set of copies of the documents listed above. Basically what is happening in the background is that the inspector is creating a permit that says you are allowed to export your vehicle (it’s not wanted by interpol). You’ll receive a certificate with some stamps and signatures which you will need in order to ship. After you receive the paper, make sure all the numbers are correct (name, VIN, etc). You shipping agent may ask you to take a picture and send it to him/her.
You are done for the day. You should make 5 or 6 copies of all the documents listed above (your agent will tell you) as well as the new paper that says your vehicle title is clean and you can export your car. There is a little kiosk outside the inspector general’s office that makes copies.
Next, you’ll head up to Colon (talk to your agent). Our agent had us meet at a specific place (he gave us GPS coordinates). We followed our agent to a customs office. The agents know the customs officials as they work with them all the time. They’ll do all the paperwork while you wait around; you’ll just need to sign.
After the customs work is done, you’ll head to the port. Our agent handed us off to another helper on a motorcycle, who we followed to the port. We parked right outside the port while the helper went in (he’ll want that bundle of copies you have as well as the originals). When he comes back, he’ll have some papers you need to sign. BEFORE YOU SIGN: make sure all the info, including VIN, is correct. ANY mistake will slow you down later.
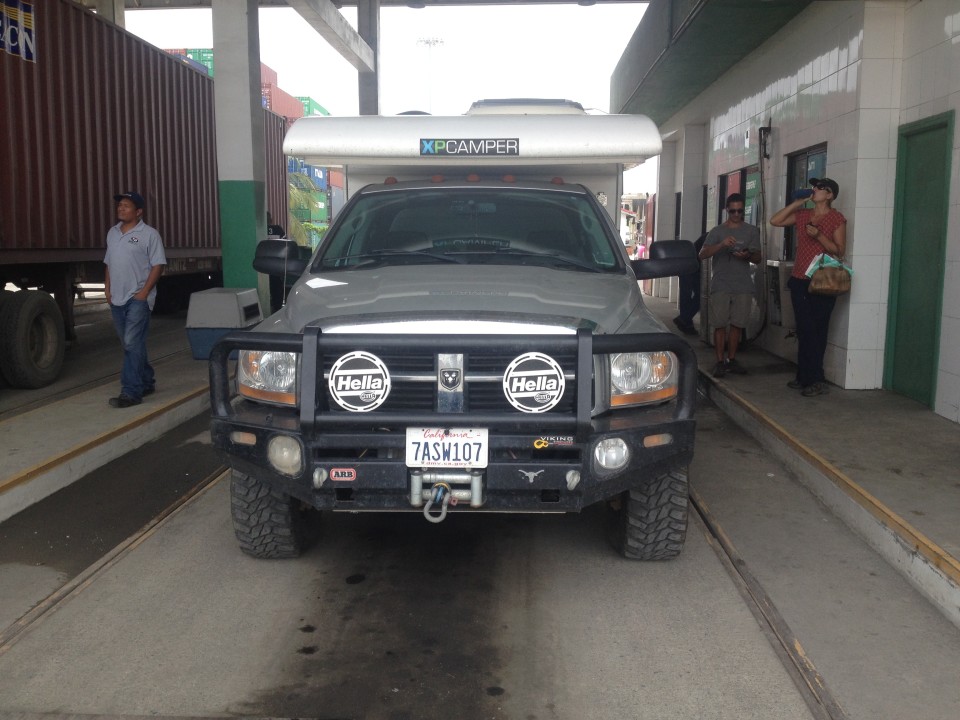
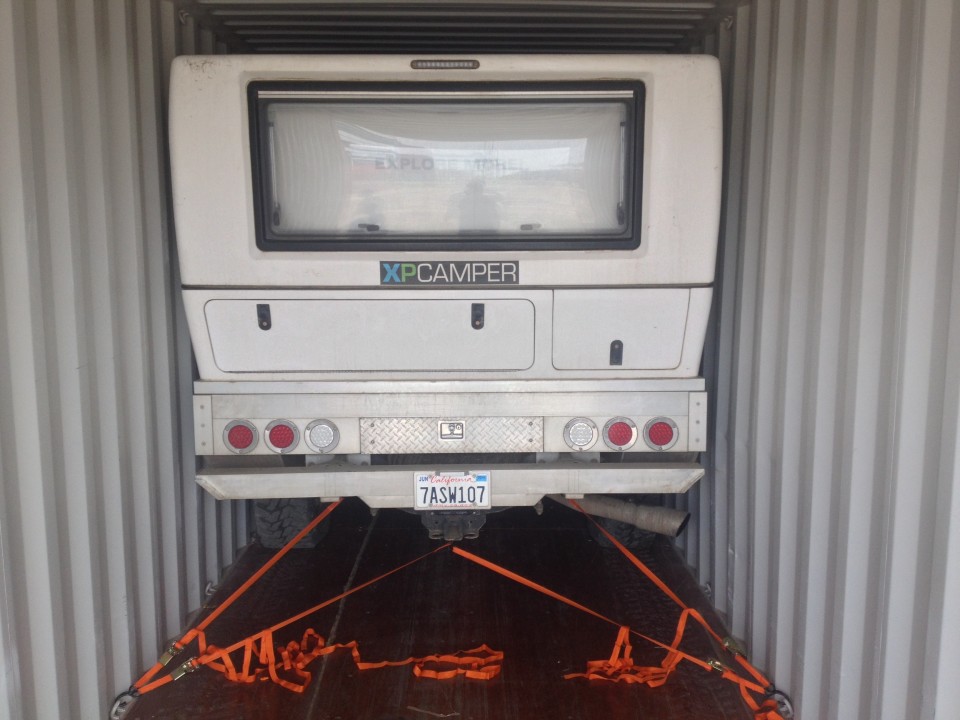
After we signed these papers, we eventually had to drive our vehicles onto some big scales where they were weighed. After that, we drove around to where our container was waiting for us and the helper helped us load the cars (he provided ratchet straps, etc).
Once you load the vehicles, take some pictures of the containers. We took pictures of the container loaded with the vehicles, and all the numbers on the container. You never know when you will need this. Around this time, we had to make a payment to the helper ($650 USD each). This had to be done in cash.
Next, they’ll close the container up (you may need to wait while the helper gets the official who will lock the container). The lock on the container has a specific number on it. After the container is locked, take some pictures of the lock! You will need to verify it later. Your shipping agent may also ask you to send a picture of the lock to them.
Congratulations, you are done on the panama side! This was a very easy process for us, as the agent and the helper did all the hard work. It was mostly just waiting around for us, and trying to keep cool. Suggest you bring something to keep you entertained, like a book.
Colombia, Cartagena
The People
We didn’t get a shipping agent on the Colombia side, but the process was complex enough that it would have probably been a lot easier if we had one. With a shipping agent, the process below would probably be:
- Meet with your shipping agent
- Let him/her take you around and sign the forms that he puts in front of you
- Drive yourself to freedom!
Your agent on the Panama side may be able to recommend an agent. We also had some other Overlanders recommend Manfred:
- Manfred H.H. ALWARDT, Ing. (manfred.al@gmx.net)
The Places
- Global Shipping Agency Office (Manga Port) – N 10.40581, W 75.53090 – If you ship with Evergreen, this is the location for the office inside the Manga Port.
- Sociedad Portuaria (SPRC) / Manga Port CSR Office (Servicios al Clientes) – N 10.40643, W 75.52849 – You’ll be spending a lot of time here with the port operations people, filling out forms, paying bills, etc.
- DIAN Office – N 10.40963, W 75.53403 – This is the customs/aduana office, just north (walking distance) of Manga Port.
- Contecar Port – N 10.376478, W 75.507160 – This is where your vehicle will likely be held in a shipping container.
- HBL Seguro – N 10.42522, W 75.54792 – You can purchase SOAT (required colombian auto insurance) here. You need your vehicle import form from customs at least partially filled out. This place is on the 2nd floor of a little shopping complex.
The Process
What lies below is a walk through of what the “ideal” process would be. Our experience varied from this due to some issues we encountered.
New Quest Received: Retrieve Letter to Authorize Container Unloading
Your shipping agent on the Panama side should introduce you to someone from the shipping line on the Colombia side. For us, that was David Gomez of the Global Shipping Agency. We had been communicating with him before the whole process started (on the Colombia side), and he made it clear that we needed to start out with a visit to his office. So first, you should go to the office of your shipper (Global Shipping Agency Office for us). You will need to get an access badge as they are located inside the port. There are offices at each port called something like “CONTROL DE ACCESO” where you can get an access badge. In almost all cases you need a passport to show as identity, and whatever documents you are currently working on usually help with the process (even a copy of your bill of lading).
The shipping line agent will give you a couple of bills that you have to pay. Go run to one of the nearby banks (Side Note: most places close from 12-2 for lunch) and pay the bills. Return to the shipping agency office. They will take the receipts you have from the bank, and they will give you a letter that authorizes you to unload the container. They may also give you a copy of the Bill of Lading for your container. At this point, David Gomez tried to explain the process to us. It was a little bit helpful, but not 100% accurate. So just keep in mind they may not know the exact process.
Quest Completed! Congratulations, you receive +25 XP.
For the next part of the process, you can get head start if you do this beforehand (at any point):
- Get a life insurance policy for $25K USD (50M COP) or more (for accidental death & dismemberment). Most travel/health insurance policies already include this. Have a copy (electronic or otherwise) ready. You need this to be allowed in the port; so only the driver/owner of the vehicle needs this.
- Make copies of your passport pages showing your exit stamp from panama and your entry stamp into Colombia. 3 copies should be enough.
At all times, I just generally try to keep at least 5 copies of the following on me: passport, drivers license, vehicle title.
New Quest Received: Authorize & Schedule Container Unloading
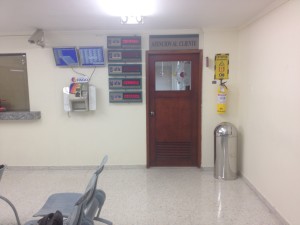
Head into this door to find the friendly english-speaking port operations experts who can assist you through the whole process.
Next, we headed to Manga Port CSR Office. You will need an access badge (talk to the woman on the right as you enter the A/Ced building). Tell her you need to go to “Servicios al Clientes” — you can show her the bill of lading and the letter from the shipping agent. She will need to see your passport.
Go into the Servicios al Clientes area. On the right there is a door labelled “Atencion al Cliente” — head in here. Show the letter, attempt to explain in poor spanish that you are trying to import your vehicle. They will point you towards a CSR (customer service representative) who can speak english and will help you through the process. For us, this was a woman named Andrea (she helped all the Overlanders), and she was amazingly patient and extremely helpful. She will help you get setup for the rest of the process!
At this point, you should have a life insurance policy prepped. You can have an electronic copy, or paper is fine. You need to show that you have $25,000 USD in accidental death and dismemberment insurance. If you have a copy of this ready, it will speed your entry into port. If necessary, you can buy a 3-day policy in town (the CSR can tell you where they are), but there are plenty of places you can do this online for better prices.
The CSR rep will help you fill out some forms, requesting port fees for the handling/emptying of the container. Once this is done, you’ll run outside the little office and request some bills and then immediately pay them (there is a bank right inside the offices here).
Once you pay the bills, return to the CSR rep. She will give you a form that is a request to unload the container at a specific time. They will need the letter of authorization you got from the shipping agent as well as a copy of the bill of lading. They will complete a new form that shows the date/time that your container will be unloaded. Now your container is schedule to be unloaded!
Quest Completed! Congratulations, you receive +100 XP! You have reached Level 2!
New Quest Received: Create Temporary Vehicle Permit & Schedule Customs Inspection
Now, head over to the DIAN office. Finding the exact place where you get and fill out forms here is kind of complex. A nice security guard escorted me the whole way, as there weren’t any signs here.
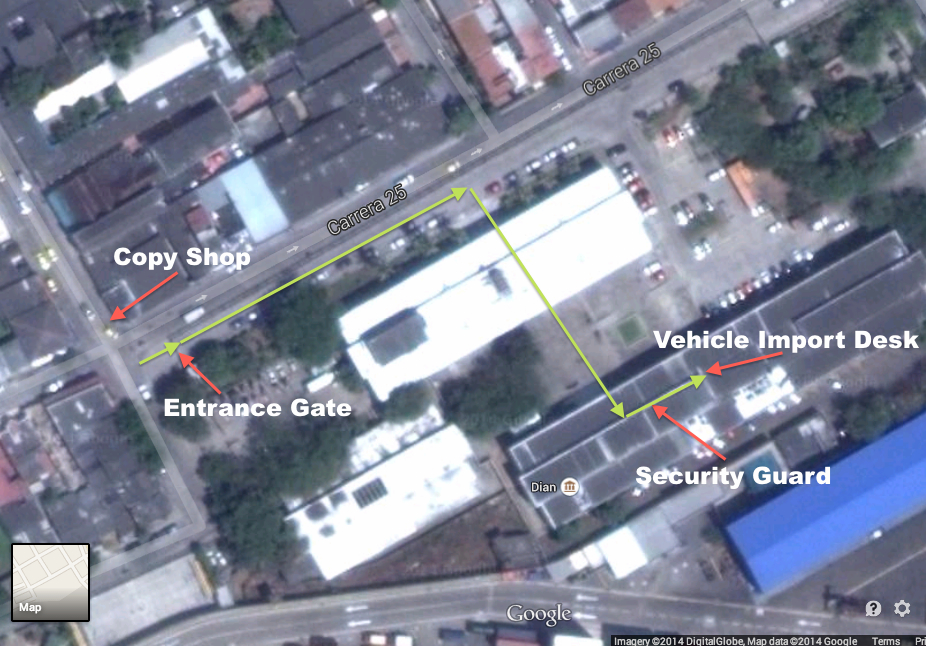
This map shows where we had to go to get our Temporary Vehicle Permit as well as our Inspection Certificate. Ask security guards if you get lost! They were very friendly!
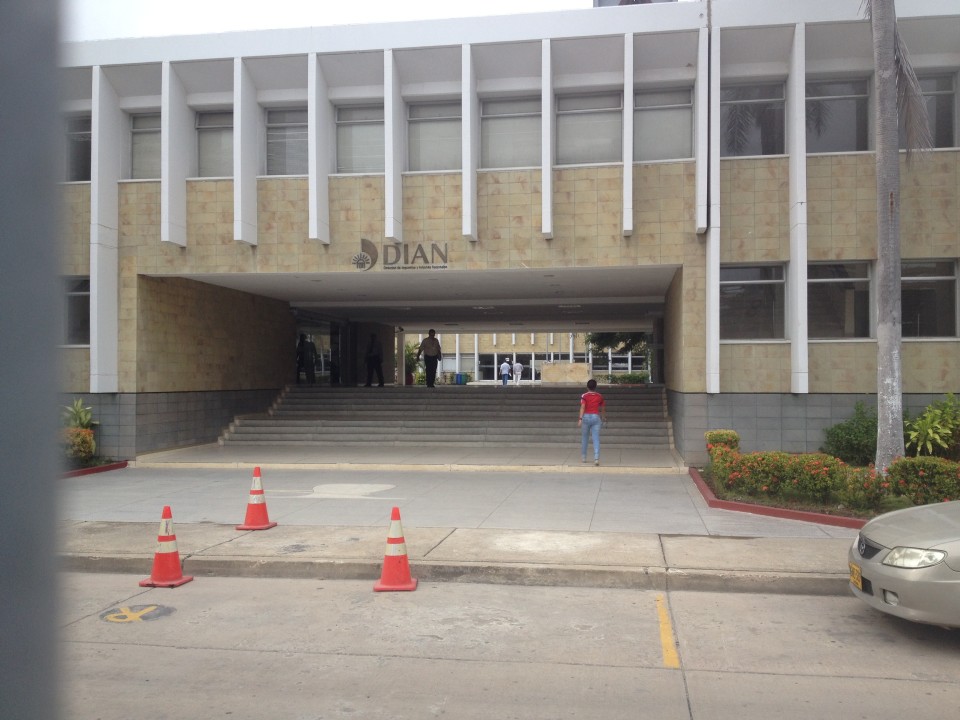
A picture of the DIAN building outside the gate. You’ll walk through the tunnel and to the building beyond, where you’ll take a left once inside in order to get to the Vehicle Import desk.
Once you get to the right set of cubicles, you can show them the scheduled time that your container will be unloaded. They will have you fill out a form — the Temporary Vehicle Import Form. They will need those copies of your passport stamps into colombia, as well as copies of your passport, title, and 2 more copies of the form they are handing you. Fill out the form, head across the street (from the entrance gate to DIAN) — you can get copies. If you get lost, just ask the security guards at the gate. With the copies, return to the DIAN office and hand the form in. They will just check the form over, and then they should say that your appointment is scheduled and you are good to go! Make sure they have scheduled the inspection (we ran into an issue where the agent didn’t show up for 3 hours).
Quest Complete! Congratulations, you receive +275 XP!
New Quest Received: Get SOAT Insurance (side note: this is a side quest that can be performed out of order after you have completed the previous quest)
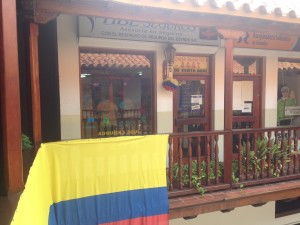
You can purchase required SOAT insurance at HBL Seguros, on the second floor of a little shopping area.
Likely you have done all you can today; the container unloading will likely be scheduled for the next day. At this point, you will have a copy of the temporary vehicle import permit, and you can take this to HBL Seguro where you can purchase SOAT insurance. The cost of this insurance is based on the number of cylinders in the vehicle, the size of the engine (liters), and the number of days you entered on the temporary vehicle import permit. Also, this process can be done by anyone, not just the owner of the vehicle.
They may ask for more copies of stuff in the HBL Seguro office, but there is a copy shop right across the mini-mall.
Quest Complete! Congratulations, you receive +75 XP!
New Quest Received: Unload the Container, Receive Customs Vehicle Inspection
Head to Contecar Port at the scheduled time. I recommend you show up 20 minutes early.
Here is a tip about how to reduce the cost of Taxis around the city. See all those dudes on motorcycles driving around with extra helmets? They are Taxis! You can flag them down. They are MUCH cheaper than a car as they can skip all the tolls. They are also usually faster.
Side Note: to get entrance to Contecar, you will need closed-toed shoes and long pants.
Once you get to Contecar, head to the “CONTROL DE ACESSO” office. Show them the paper you got from the CSR rep showing the time the container will be unloaded. They will give you a hard hat and a badge to enter the port. At this point, someone should escort you into the loading dock area. You should be able to see your container, all locked up. Take some pictures. A customs agent with some bolt cutters will come out and cut the bolt. You should take pictures before hand and make sure the lock is the same as the one when you shipped in Panama.
Once the doors are open, unload the cars. Take pictures of the unloaded container (completely empty, you may also want to get some snapshots of the numbers on the doors), and e-mail these to your shipping agent in colombia (David Gomez in our case). You will drive the vehicle to a separate area of the port–a huge parking lot filled with cars. There is a little office on one side of this parking lot. I think that this is where the customs inspection should take place. I’m not sure because we had some trouble unloading our truck and missed the inspection. Anyhow, make sure you take some pictures of your truck at the port. Also take pictures of your VIN number. I was able to use these pictures in place of the inspection. The inspection is mainly just attempting to verify the VIN number of the vehicle.
Say goodbye to your vehicle for a little while! With the inspection completed, the customs agent will tell you when you can pick up the inspection form at the DIAN office. This might be immediately; it might be the next day.
Quest Complete! Congratulations, you receive +500 XP! You have reached Level 3!
New Quest Received: Retrieve the Original Bill of Lading From Shipping Line Agent
At some point, your shipping line agent will respond to your e-mail with the pictures of the emptied container. You’ll need to head back to the shipping agency office and he will give you a couple pieces of paper, the most important of which is the original Bill of Lading!!
Quest Complete! Congratulations, you receive +150 XP!
New Quest Received: Retrieve Vehicle Inspection From & Completed Temporary Vehicle Import Form from DIAN Office
Head back to the DIAN office where you got your temporary vehicle import permit. They will fill out the bottom half of the form and give you another sheet of paper that shows that the vehicle was inspected by customs.
Make sure that all numbers on these forms are correct, otherwise it will slow you down later!
With these two forms, head back to the Manga Port CSR Office. On the way, you may want to stop by the copy office and make a couple copies of these completed forms, as well as the original bill of lading (assuming you’ve got it by now; otherwise you can stop by and pick it up before doing the next step).
Quest Complete! Congratulations, you receive +150 XP!
New Quest Received: Schedule Time to Remove Your Vehicle from Port
Back in the office with your CSR rep, you’ll need to fill out a couple more forms. You have to pay one more port fee; it’s easy. Give the CSR rep the DIAN forms (temporary vehicle import permit & the vehicle inspection form) as well as the Bill of Lading. She will take these (you may need copies of all these) documents and generate a new form: an authorization to take your vehicle out of the port. She will also schedule a time for you to pick it up. Hold on, you are almost done!
Quest Complete! Congratulations, you receive +450 XP! You have reached Level 4!
New Quest Received: Retrieve Your Vehicle from the Port
Head back to the Contecar port at the scheduled time. Again, I recommend getting their a little early.
Reminder: you need long pants and closed-toed shoes, or you won’t be able to get in.
Do NOT go to the ACESSO DE CONTROL office, head to the place where you see the huge trucks entering/exiting the port — the main entrance. You should see some signs that say something like “BASCULAS 1″, “BASCULAS 2″, etc.
Show your piece of paper that shows the time you can pick up your vehicle. They may need your drivers license and/or passport. Someone will come to escort you to the vehicle parking lot. You’ll get into your car and drive it over towards the little office in the corner. They will generate a new form that has 3 carbon copies — you need this to exit the port. With this form in hand, you can drive to the exit. Present the form to the officer at the gate. You may need to get out of your vehicle, as they will do a cursory inspection. They will also have you look at a camera and they will take a picture of you next to your vehicle.
Quest Complete! Congratulations, you receive +900 XP! You have reached Level 5!
New Quest Received: DRIVE TO FREEDOM! HEAD TO USHUAIA!
Appendix A: Song of the Road’s Experience Unloading Their XP in Colombia, AKA, 4 days of sweat, blood, and tears.
What I have recorded above is the way I believe that the port process should work in an ideal world. In the real world, there are lots of hiccups, and that was certainly the case for us.
First off, our shipping partner decided to take the boat from Panama to Colombia. This means that he would be a day late arriving, so the process wouldn’t be able to start immediately. I decided to try to get the process jump started (which I recommend); what would have been ideal is if we had our shipping partner’s keys in our possession. This became a sore point later on.
So, I started the process by myself. Paid bills, got the authorization to unload the container, got SOAT insurance, etc. The unloading and inspection was all scheduled for the afternoon of the day our shipping partner was supposed to arrive (the following day; we had a buffer of 4 hours). Unfortunately, the boat was delayed, so the unloading was delayed an hour while I waited for my shipping partner to race from his boat to hand off his keys to me (he couldn’t enter the port as he hadn’t shown life insurance yet). This made us miss our customs inspection.
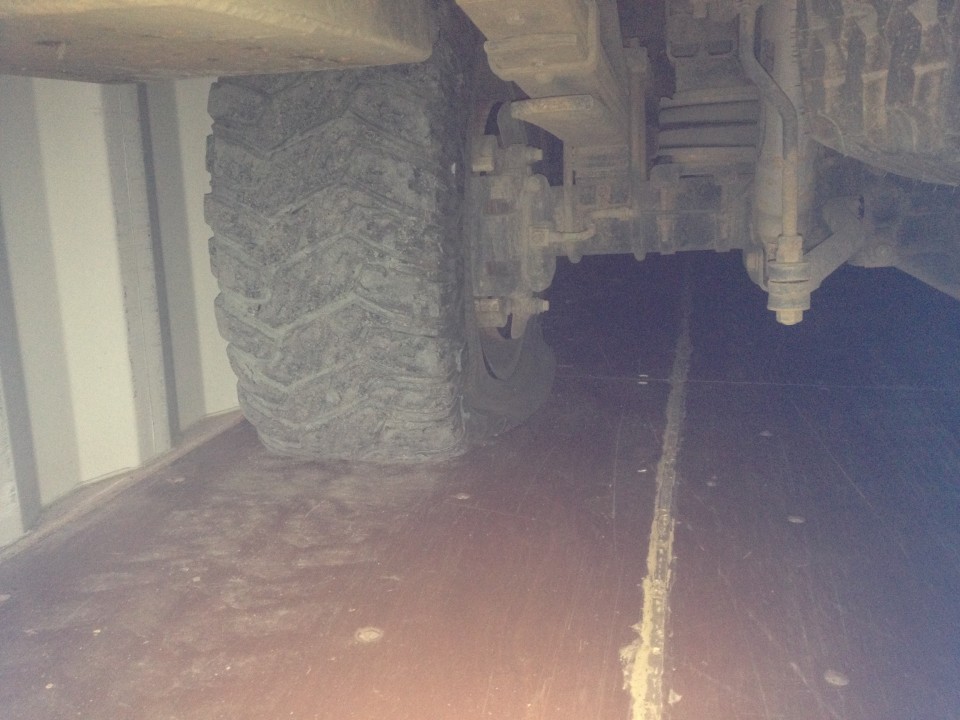
In addition, when we opened the container, the XP had a flat tire! Turns out we had a leaky valve stem we didn’t notice. This took about 4 hours extra to unload the XP from the container, by which time the customs official was gone.
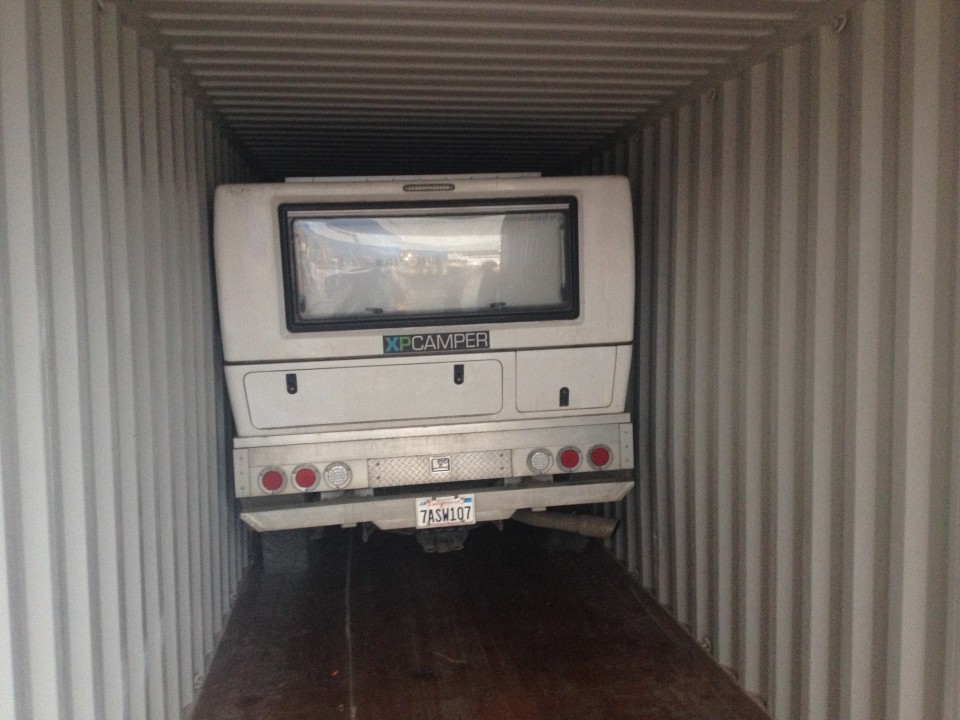
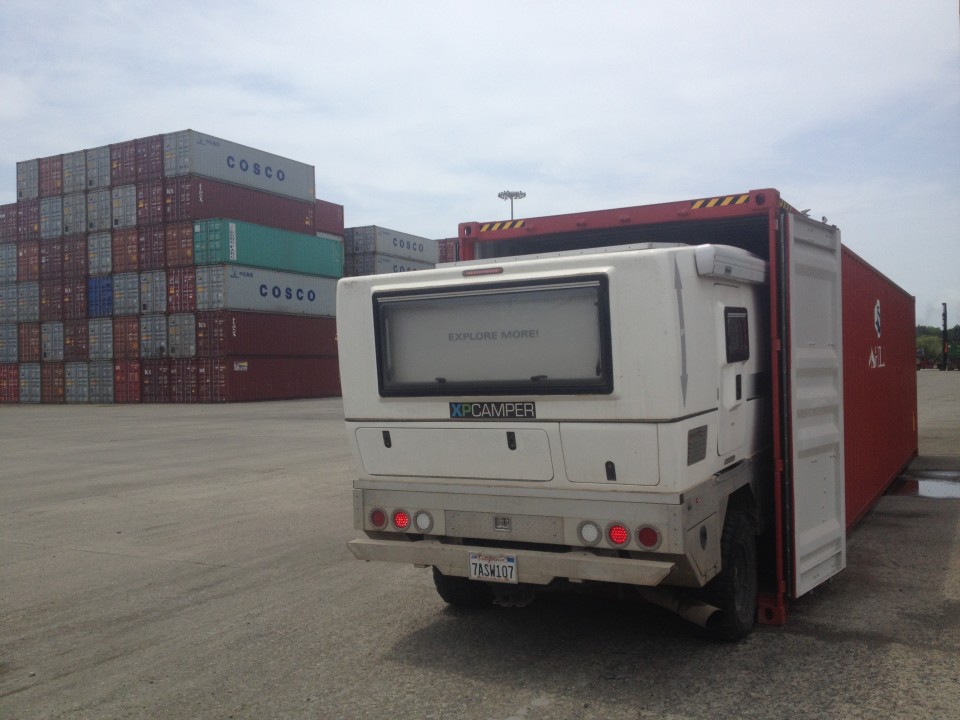
Yeah, our XPCamper is leaning against the side of the container. That’s not good. Luckily there was no serious damage, just some minor scratches (we like to call that “character”).
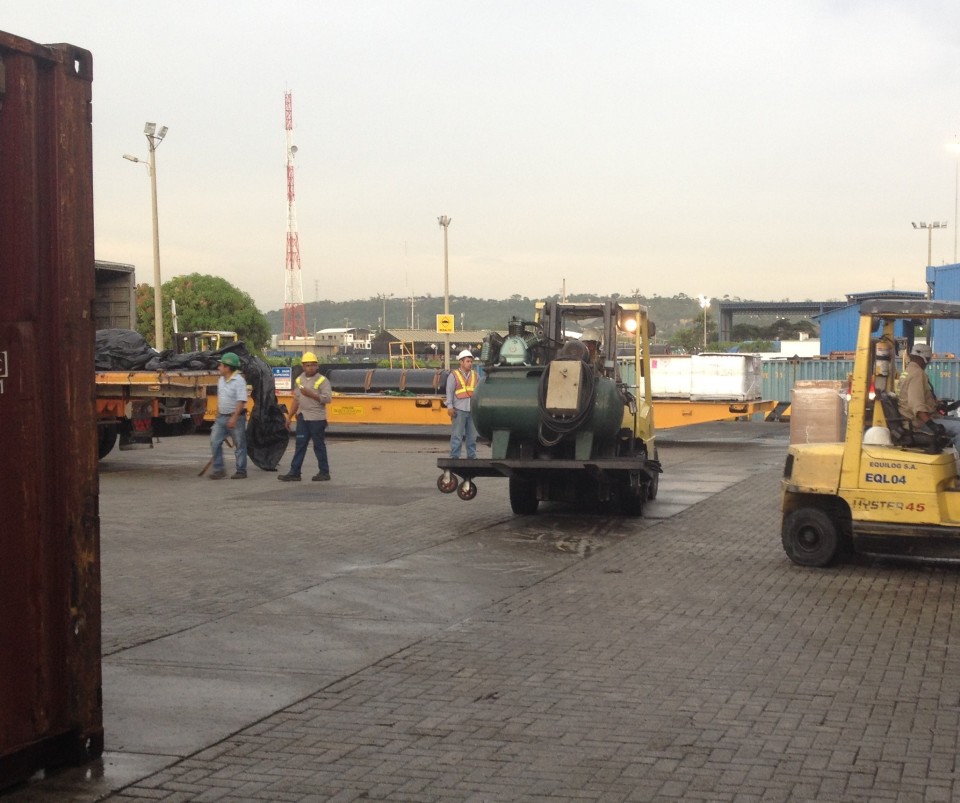
We initially tried to fill the tire with a small compressor, but it just didn’t work. Luckily, the folks at the port are quite resourceful:
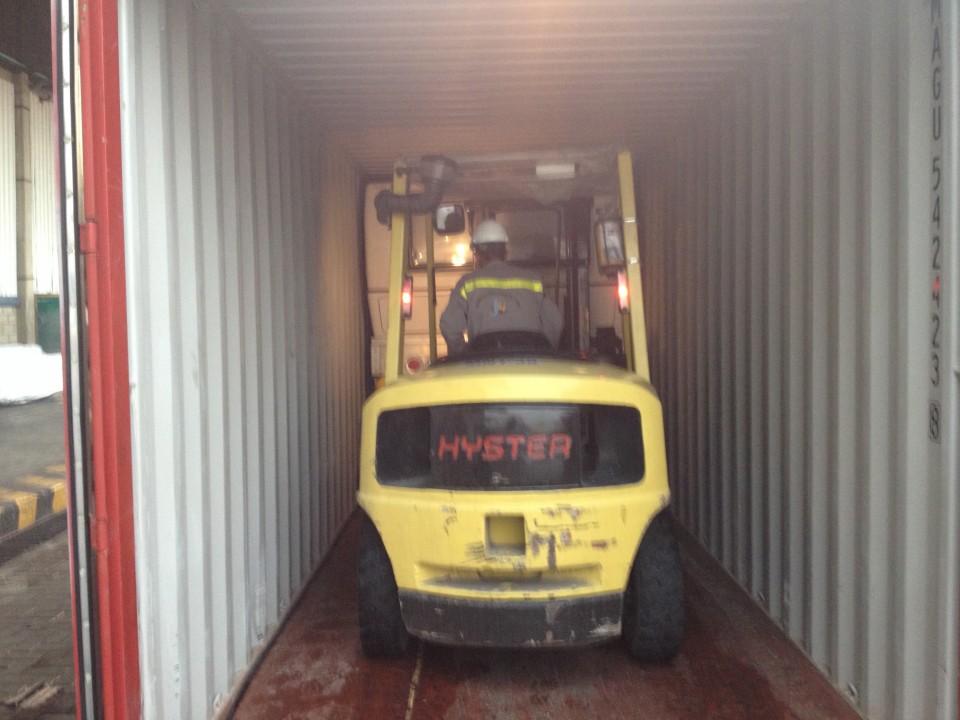
This is a crappy iPhone Photo, but that fork lift had to lift the XPCamper up so the tire could be inflated!
Our shipping partner had to wait until noon the next day just to get his passport back from his captain, so he couldn’t really do any more anyhow. However, I went to Contecar port in the morning to try to get the inspection I missed. It’s unfortunate I didn’t take pictures of the vehicles & the VIN #s on the vehicles the previous day when I was in the port, because it would have been enough. Instead, I had to wait in the waiting area while some poor port worker took the pictures.
I then raced back and completed the vehicle import permit, received the inspection certificate, and picked up the original bill of lading from the shipping line agent.
Meanwhile, my shipping partner was still waiting on his passport. He was able to send some insurance over to the CSR rep at the port who verified it. Unfortunately, our shipping partner’s car hadn’t been inspected, and I was unable to get pictures. So, we had to schedule an inspection the next morning (we did a bunch of running around at the DIAN office to fill out his forms). At this point, I probably could have gotten my car but I stuck through the next steps with my shipping partner, to try to smooth things out for him.
At the inspection the next morning (scheduled at 6:30), we waited over 3 hours for an inspector. My name was the primary name on the port documents, so I had to go into the waiting area with my shipping partner, even though my vehicle had been inspected the previous day. During this time I was able to air my tires back up and discover that a piece of my suspension fell off somewhere between Costa Rica and Panama. Fun.
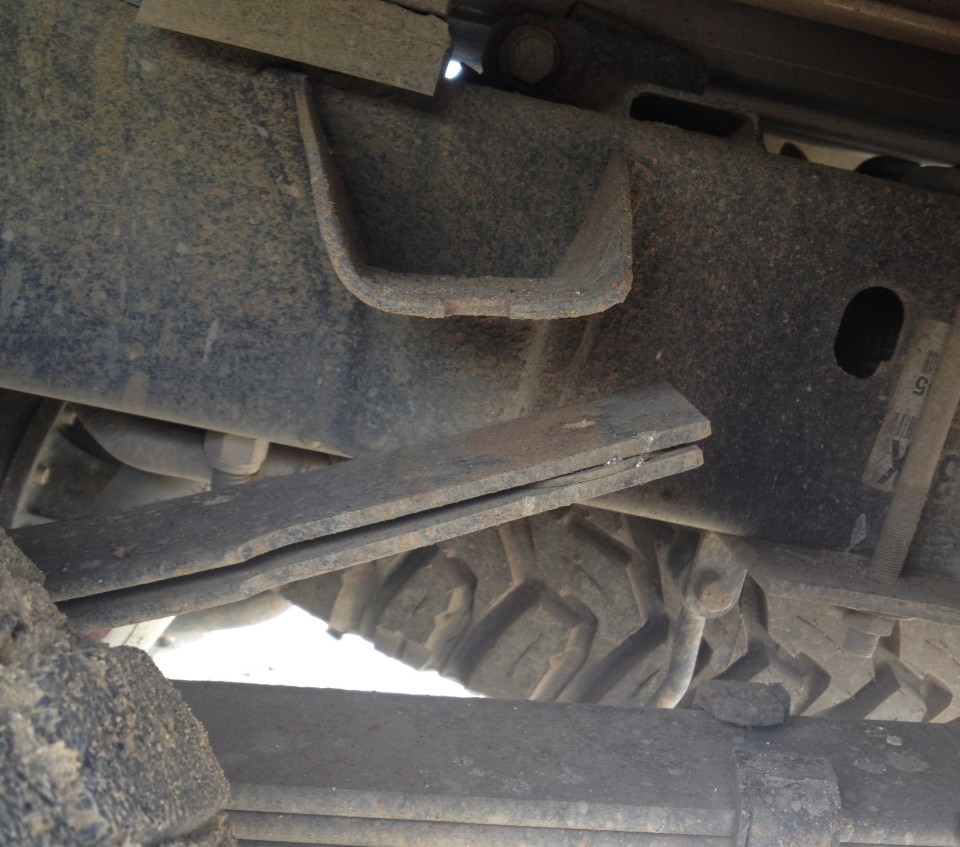
There is supposed to be a big plate there that rests against the leaf spring. I think it may be back on the Osa Peninsula somewhere…
The agent finally showed up, looked at the VIN number on the car, and said “OK DONE.” We raced back to DIAN with him in a taxi and waited for the completed forms. After that, we headed back to our CSR agent in Manga. We did a few final forms, paid an extra bill (we were there one more day than we should have been — it cost $8) and scheduled the appointment to pick up the vehicles at 2:00.
We raced back to Contecar, wandered around trying to figure out what to do before we were pointed towards the BASCULA signs, and then were finally able to get our vehicles! Whew!


